Answer Part 3: Heating
Through our testing of removal techniques, we arrived at the conclusion that using heat to remove gum along with the chemicals and abrasion is more effective than not using heat. When removing the gum, the gum is first heated until it begins to darken in color, then chemicals are poured on it and the abrasion tool is applied. After the gum is completely gone, we wash the area with water. We have found the heat to be effective in loosening up the gum so it is easier to remove. The heat works nicely with our approach to this problem, since it does not discolor the concrete when removing gum stains, and we have been able to find chemicals that do not react dangerously to intense heat.
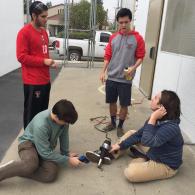
To create our current heating mechanism (pictured below), we combined the high-throughput fan of a hair dryer with the powerful heating element of a heat gun. Our system features a switch that allows the heating coils to either be on or off while the fan is on, allowing for the coils to be cooled following use. In order to combine the hair dryer and the heat gun, we had to completely disassemble the casing, and we had to separate the hair dryer’s motor and its heating element. With the disassembled parts, we used wire nuts to form a temporary connection, so that if necessary we can change the wiring without having to worry about solder. Once that was finished, we created a shell using CAD software, then sent it to a 3D printer to be finished. The shell we designed gave about a 50% increase in airflow over the original blow dryer case. The next step we are going to take is getting ready to integrate the heating unit into the main body.
![[Hair dryer shell with heater unit inside.]](/sites/default/files/inline-images/IMAG0544.jpg)
![[New 3D printed shell with heating unit inside.]](/sites/default/files/inline-images/IMG_5109.JPG)
![[Heating unit outside of a shell.]](/sites/default/files/inline-images/IMAG0539.jpg)